Jump to content

JRE 6L80/6L90 transmission dipstick install.


Recommended Posts

As everyone here already knows…”it shouldn’t take more than a few minutes” turned into me pondering how many fist sized dents I needed in my door panel for aerodynamic efficiency or the “golf ball” look.


Anywho.


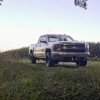
I delved into the underside of my custom trail boss in an attempt to install a dipstick in my 6L80. Of course, I must mention that the 6L80 was present in the 4.3 models until at least the 2020 model year (RPO code MYC), this dipstick fits all 6L80/90 transmissions as far as I’m aware, in the 6/8 cylinder engines alike.


Here is the order of operations.


NOTE: TRANSMISSION CROSSMEMBER REMOVAL OR DROPPING THE REAR OF THE TRANSMISSION WAS NOT REQUIRED. FOR MY APPLICATION.


Remove dipstick from tube to make installation easier. The dipstick gets in the way otherwise. Also, lube the seal and tube with white lithium grease to ease insertion.


In order to access the hole where the plug is (that must be removed prior to installation), there is a heat shield that needs removal on the passenger side of the transmission. It is held on by two 10 mm bolts. Beware of the front one, it’s blocked by the bend in the shield, and too close to the catalytic converter to get a regular 3/8” ratchet and shallow well socket in there.


After removing the heat shield, you can use a trim tool, your fingers, or a screwdriver to remove the plug where the dipstick enters the transmission (there is only one location it will go).


Then, find the studs on the backside of the bellhousing, and locate the one below the starter hump. Using a 15 mm deep well, swivel, and breaker bar or 1/2” ratchet, remove the stud. 
 

Test fit and place it in its approximate location, but beware the ground strap on the back of the block, right next to the path of the tube, there is a chance it gets in the way like mine, and you’ll need to loosen it in order to route the tube unabated. 15mm bolt.


Install your dipstick seal first, you can use a thin layer of white lithium grease for ease of insertion. Follow up by seating the tube in the grommet, and then reinstall your bell housing stud. Be mindful that torquing that stud could cause the dipstick to raise out of the hole, so it’s wise to keep light pressure downwards on the tube to ensure it stays in the transmission until you snug and tighten the stud.


Once the tube is seated and the stud installed, make sure your O2 sensor wire holder/zip tie is still in its pocket on the transmission, and reinstall the heat shield. 
 

If you had to loosen or remove the ground strap on the block, reinstall/tighten the bolt.


Use the procedure sent with the dipstick to check level and add fluid as needed. Mine needed 1 quart (this is typical, mine didn’t leak and hasn’t lost fluid.).


This dipstick does work with aftermarket and deep pans. Lubelocker also makes a reusable gasket for the 6L80 and one for the 6L90 if anyone is interested.

Edited by s10dragracer888
  • Thanks 1
Link to comment
Share on other sites

Thank you! I wish they made the 6, 8, and 10 speed transmissions to come with a dipstick and drain plug in the pan. It’d be too much to ask to be able to change the filter like we could on the Allison 1000/2000s.

  • Like 1
  • Thanks 1
Link to comment
Share on other sites

Join the conversation

You can post now and register later. If you have an account, sign in now to post with your account.

Guest
Reply to this topic...

×   Pasted as rich text.   Paste as plain text instead

  Only 75 emoji are allowed.

×   Your link has been automatically embedded.   Display as a link instead

×   Your previous content has been restored.   Clear editor

×   You cannot paste images directly. Upload or insert images from URL.


×
×
  • Create New...

Important Information

By using this site, you agree to our Terms of Use.