Jump to content

PFTX_5.3 Build


PFTX_5.3

Recommended Posts

This truck is a 2015 5.3L Fully Loaded SLT

My goal is to build the ultimate work truck, prepared to deal with what I encounter daily, it's come a long way but I am always improving and modifying it

Please feel free to reply to this thread with any questions, I'd love to help you out


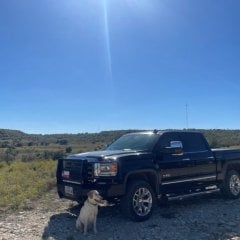
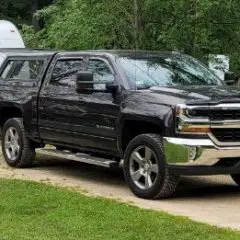
My signature picture is before the 1" lift, profile picture is after

Attached is what the truck looked like the day I bought it, I have since done:


Ranchhand replacement bumper

Tow mirrors

Full LED bulb swap

Front light bar                Toggled with high-beam stock

Front ditch lights           Toggled with high-beam stock

Yukon gear shifter

Rear spotlights with strobes

2" Leveling kit

Front 1" lift

Rear Monroe load shocks

Fog lights with high beams

Cargo lights with reverse lights

Catch can

Transmission pill flip

Range AFM disabler

Speed Turtle flasher module


Truck Stock.jpg

Edited by PFTX_5.3
  • Like 1
Link to comment
Share on other sites

  • 3 weeks later...

Emergency Lights, Ft: Daisy, the best dog ever


https://www.amazon.com/photos/shared/Rn1miZzkRKqZ0EClm45DHQ._j9oXP6ksclSrhZEBqBGG2

This is achieved by a Speed Turtle Engineering Module 2.0 and no-name Amazon lights off the rear bumper. The emergency lighting is a necessity due to the farm being located on a busy two lane road, I frequently have to block both lanes to allow equipnent to travel down the road.

Link to comment
Share on other sites

This is how I have the bed setup. Yes, I'm a Ryobi guy, they are 95% of what the Milwaukee Fuels I have tested them against. Plus the Ryobi box system works better for vehicles than Milwaukee Packout. I'm the in-house fix-it guy, from facilities to wrenching, I do it all. This truck has it all, from almost every power tool to a 12-ton jack to a full set of sockets and wrenches complete with a beer cooler. The four boxes closest to the bulkhead building repair tools, I have a lot of duplicate tools on the truck but I like to keep a separate set of tools for field repairs because I don't want oily tools in my buildings. I can't recommend the drawers enough, I have full access to a 290-piece mechanic set and a set of hand tools without climbing into the bed, the drawers are my field repair kit. I liked the drawers so much that they are now one of the first things any of our new trucks gets. The cooler locks into the Ryobi rails by cutting the top off of their cheapest full-size box and screwing the locking part of the box to the bottom of the cooler.

Bed 1.jpg

Bed 2.jpeg

Bed 3.jpg

Link to comment
Share on other sites

Front lighting,

Yes I have a headlight out. I hate not being able to see at night this allows me to see over 180 degrees clearly lit up in front of the truck. The light across the grille is a 30in bar, the ones below the headlights are 6in bars pointed at 45 deg to bridge the gap between the front bar and the flush mounts on the side. The three lights on the front are triggered by the high beam switch in the truck using a fuse tap and a relay. The flush mounts are triggered by the fog light button using the same process as the high beams. I also have done the all-lights mod so the pictures are when the blinker stock in is the high beam position with the fog lights off. Fog lights can still operate normally unless the high beams are on.

Fog Lights.jpg

High Beams.jpg

Link to comment
Share on other sites

Posted (edited)

All lights mod + cargo on when doors open,

I've got a buddy with a f150 and I like that when he opens his doors his cargo lights come on. My cargo lights come on when unlocking the truck at night due to them being tied into the reverse circuit. Because of my job, I am constantly grabbing tools and parts out of my truck when it's night but I don't lock it and unlock it every time so cargo/reverse lights don't come on. This fixes that.


All Lights Mod.jpg

Dome-Cargo.jpg

Edited by PFTX_5.3
Link to comment
Share on other sites

Posted (edited)

Reverse Lighting,

Again, I don't like not being able to see at night. The lights on the back bumper are the same as the ones strobing in the post above. Directly under the driver and passenger floorboards, I have 3in pods pointed about 75 degrees out, I also have the same 3in pods on the rear bedsides pointing directly out. All of these lights are triggered by putting the truck into reverse using a fuse tap and a relay.


Reverse Lights 1.jpg


Reverse Lights 2.jpg

Edited by PFTX_5.3
Link to comment
Share on other sites

Posted (edited)

Auxillary fuse panel,

I mounted the aux panel on the lid of the engine compartment fuse box. I chose this location because it gives easy access to wun wires up front and to the rear of the truck following OEM wiring harnesses. Also gives easy access to the fuses I run the lighting off of. Yes, wiring is messy, what can I say, I'm a farmer. No more wiring directly off the battery or inline fuses.

Aux Fuse Panel.jpg

Edited by PFTX_5.3
Link to comment
Share on other sites

Posted (edited)

Auxillary fuse panel power,

I ran the power off of the power distribution box with 10awg stranded wire and also added a 100amp inline fuse. The wire I ran to the aux fuse panel is the red wire running along the cowl.


Aux Fuse Panel Wiring 1.jpg

Aux Fuse Panel Wiring 2.jpg

Edited by PFTX_5.3
Link to comment
Share on other sites

Auxillary fuse panel ground,

I didn't want to run a ground wire all the way to the battery or want any wires on the battery terminals. I ran the wire to the ground strap on the drivers side cowl, about 18in from the aux fuse box, also 10awg stranded wire.

Aux Fuse Panel Wiring Ground 2.jpg

Aux Fuse Panel Wiring Ground.jpg

Link to comment
Share on other sites

Join the conversation

You can post now and register later. If you have an account, sign in now to post with your account.

Guest
Reply to this topic...

×   Pasted as rich text.   Paste as plain text instead

  Only 75 emoji are allowed.

×   Your link has been automatically embedded.   Display as a link instead

×   Your previous content has been restored.   Clear editor

×   You cannot paste images directly. Upload or insert images from URL.


×
×
  • Create New...

Important Information

By using this site, you agree to our Terms of Use.