Jump to content

K2xx GMC 2500 Swap how to


Recommended Posts


Ok Members,


 Here is the all inclusive way to swap a GMC K2xx 1500 front bumper to a 2500 Front Bumper.  This is for the Sierra only, the Silverado is/may be different.


First lets start with what IS needed the part numbers if applicable.


HD Grille (PN Varies )

HD Bumper assembly (PN varies)

HD "headlight fillers"( GM list's them as 'Top Cap Assembly)

--------LH PN 22831429 Paintable

--------RH PN 22831430 Paintable

HD headlight filler brackets ( GM lists them as Fascia Bracket assembly)

--------LH PN 23451021

--------RH PN 23451022


****I will also mention the Front bumper to  inner Frame support brackets.  I got them with my 2500 bumper when I purchased it, so I used them, and they work and fit great.  Im sure but cant say for certain if the 1500 bumper for frame supports can be made to work. 


Once all the swap parts are acquired, then you can begin modifying the parts on the current truck


The 1500 Bumper mounts have to be used.  I attempted to try and use the 2500 brackets and the mounting holes are in the wrong location, as well as it makes the bumper sit way too far forward away from the truck,


As for the 1500 modifications, the 3 mounting holes will need slotted so the bumper brackets can sit lower to accommodate the additional height of the new bumper.  Reinstall the brackets and drop them down until they hit the frame.  ***** I spaced my brackets up a bit off of the frame.  I felt the gap between the headlight fillers/grille, and the bumper was too much.  with a little spacing you can get the gap nice and tight*****


I also used 3 additional washers behind the brackets to space the bracket away from the frame.  With out the additional spacing the bumper sat too close and didn't align in the wheel well 

8CA15EF1-0441-4135-B9A6-F488B36823C5.jpeg


2B1E12A1-C680-497B-95C2-8F750E5E7622.jpeg


2277FAE0-27C0-4E05-9863-458AAAB909D8.jpeg


Once the frame brackets are situated, you can move onto the fascia brackets.  they are a simple swap, unbolt the 1500 and swap them for the 2500 brackets

52426D58-90A0-418C-90D9-C215592D437B.jpeg


32B720B4-FA94-40ED-B55D-342B2721585F.jpeg
 

973FB2C4-053C-467A-A3B8-A20300F8A12A.jpeg


Now install the headlight fillers onto the fascia brackets that were just installed.  The headlight filler assembly's will also use a bolt location from the 1500 grille that the 2500 does not use. 
 

CCB53F40-0528-479D-977D-015F2E09F219.jpeg


BA67591E-0898-456F-87C0-8C462449F9B7.jpeg.f33eca5d82a5ddb3724004a991d7a5d5.jpeg


Now its time for the bumper.  Install the bumper onto the frame brackets.  The 1500 brackets will only allow the Upper hole closest to the grille to be used for attachment.  The Bumper will fit pretty tight onto the brackets.  As I said earlier I was able to use the 2500 Inner bumper to frame brackets ,  they were the correct length, and shape to fit around the frame Mounts


The last big modification is the fender well trim.  The 1500 trim is much longer as shown by the blue tape line.  The trim needs cut on the bottom of the tape to align with the headlight fillers


E27F42E6-00B3-48DD-A1F3-050E179F1FAD.jpeg.99355ce6d87af18ebb2825fc3bcf9332.jpeg


09A80B5C-9078-4859-9FA6-CB079EF3B4B4.jpeg.045cdaf13d038c67af60de7b4bfbfe86.jpeg
 

4FAB558D-A4E7-463B-AB4E-35D3C2E73725.jpeg


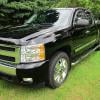
When it’s all said and done the top pic is the OEM 1500 Denali and the Bottom is the 2500 Denali Swap (yes I know the fog lights aren’t in but I was excited to take a pic)


AC324134-07E0-4727-BB61-725FC86B00F5.jpeg.b338a53505cac4ef49e2d9c6466b2c31.jpeg

Edited by 2003 SSEi
Adding pics
  • Like 2
Link to comment
Share on other sites

Join the conversation

You can post now and register later. If you have an account, sign in now to post with your account.

Guest
Reply to this topic...

×   Pasted as rich text.   Paste as plain text instead

  Only 75 emoji are allowed.

×   Your link has been automatically embedded.   Display as a link instead

×   Your previous content has been restored.   Clear editor

×   You cannot paste images directly. Upload or insert images from URL.


×
×
  • Create New...

Important Information

By using this site, you agree to our Terms of Use.