Jump to content
  • Sign Up

6.0L 6L90 dropping the tranny pan for filter change


Recommended Posts

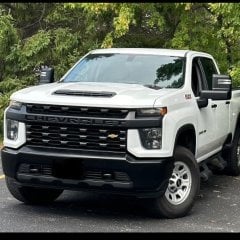
Hey, just got a 2014 2500HD 6.0L with the 6L90 tranny (truck still looks like a 2013 series)
I see lots of youtube videos on the 1500's where you pry the exhaust down slightly to get enough room to drop the pan, but I couldn't find any info on 2500's.
But my 2500 the pan looks slightly different (maybe longer cause it’s a 6L90 not a 6L80)
The exhaust also looks different, doesn’t have the flat spot like the 1500’s. Also doesn’t have the flex part that I see in the videos of the 1500s where guys pry on the exhaust or rachet strip pull on it.

Is the 2500 the same just pry on the exhaust? Anyone drop the tranny pan on these before?

Link to comment
Share on other sites

Probably not.


You will have to look under the truck but I think the exhaust has a bracket that bolts to the transmission on the passenger side. Using a pry bar will not push anything down if that is connected.

Link to comment
Share on other sites

  • 3 weeks later...

Thanks everyone


Ended up being super easy. Lots of room to get the pan out. Don't need to remove anything extra. I grabbed a 12v pump off Amazon with a 4ft hose for like 20 bucks, sucked the tranny fluid out via the dipstick. Made dropping the pan pretty much mess free. Got about 6 quarts out like this. Maybe 7. Ya sure the pump was slow, maybe 1.5 to 2 beers slow. But mess free!!!


For the filter seal, used a flat blade and a hammer and cave one part in, then grabbed it with vice grips and pulled it out. Used a socket to drive the new one in evenly. Compared to the 6l80 videos, the 6l90 seal seems allot higher up, harder to get a hammer at it. Deep socket helped.

The plastic tranny filter had the round circle that shows the year and month it was manufactured. Looks like it was more than likely the original still after 115k miles, glad I changed it. Pan seal is a metal/rubber style, so reusable.


For anyone that stumbles on this, i also replaced the tranny cooler lines and engine cooler lines (4wd model). I'm not a fan of cutting the old lines to make remaval easier, if you can't remove the old lines you can't get the new lines in.


For the engine oil lines, between the diff and motor mount is pretty tight. I ended up lowering the front diff. Pop off the 1 electrical cable, and the diff vent. Undo the front drive shaft u joint straps. From underneath 2 nuts on passenger side, 2 bolts on driver side, and 1 from up top on drivers side (a bunch of extentions and a impact made this quick and easy). Let the diff down slowly with a jack. Don't need to undo the CV joints, but let it sit on some blocks so its weight isn't hanging from the CV's. Lines came out and in from the back.


For the tranny lines, I couldn't get them to come out the back. The long bend of the line going into the aux cooler was a struggle. Ended up removing the plastic that hangs below the front bumper and fished them out the front.

Diff was already lowered from doing the engine lines, not sure if it woukd have been needed or not for the tranny lines.

Used a jack and a bottle jack to slowly get the front diff back up and lined up.


I remember it being much easier on my 93. But the supply and return lines were completely separate back then. On my new 14 the lines go to a common block that mounts on the engine, or tranny, making it harder as you have to fish both lines together instead of separate.

  • Like 1
Link to comment
Share on other sites

Join the conversation

You can post now and register later. If you have an account, sign in now to post with your account.

Guest
Reply to this topic...

×   Pasted as rich text.   Paste as plain text instead

  Only 75 emoji are allowed.

×   Your link has been automatically embedded.   Display as a link instead

×   Your previous content has been restored.   Clear editor

×   You cannot paste images directly. Upload or insert images from URL.


×
×
  • Create New...

Important Information

By using this site, you agree to our Terms of Use.