Jump to content
  • Sign Up

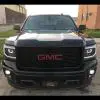
Strykers_Inc 2014 GMC Sierra Denali 6.2L (Vader)


Strykers_Inc

Recommended Posts

I'm out of the car audio game these days, but I can say without a doubt your boy knows his stuff. I'm over here drooling all over the place as I walked through the last 10 pages of this build thread. Excellent choices all the way around on your hardware. I can tell from the attention to detail that thing, once dialed in, is going to sound amazing.


I really like the blacked out Denali grill as well. I'm thinking about getting a Denali grill and having the trim paint-matched to iridium and the grill part in black, while leaving the GMC emblem as is (love red).


Congrats on an awesome build, I am also OCD and I appreciate all the detailed photos. Really scratched my itch :D

Link to comment
Share on other sites

  • Replies 464
  • Created
  • Last Reply

I'm out of the car audio game these days, but I can say without a doubt your boy knows his stuff. I'm over here drooling all over the place as I walked through the last 10 pages of this build thread. Excellent choices all the way around on your hardware. I can tell from the attention to detail that thing, once dialed in, is going to sound amazing.


I really like the blacked out Denali grill as well. I'm thinking about getting a Denali grill and having the trim paint-matched to iridium and the grill part in black, while leaving the GMC emblem as is (love red).


Congrats on an awesome build, I am also OCD and I appreciate all the detailed photos. Really scratched my itch :D

Thanks for the compliments. Still waiting on door panels, but got all the sound deadening done. Weather has kept me from really doing anything. Just don't like working in the cold when I don't have to. Spend most of my OCD time trying to keep everything clean. Spent to day cleaning and removing waterspots even though it's just gonna get dirty again with forecasted weather.


Stay tuned more to come.

Link to comment
Share on other sites

  • 2 weeks later...

UPDATE 160214


Completed making/installing custom wiring harnesses for fan controller, LED power, and mercury switches for LED controllers.


Also recieved the KAC-001 Alpine Truck Accessory Control module (for X110-SRA). Picked it up in preparation for later because I got an awesome deal on it.

post-131387-0-98406400-1455591779_thumb.jpg

post-131387-0-98406400-1455591779_thumb.jpg

post-131387-0-98406400-1455591779_thumb.jpg

post-131387-0-98406400-1455591779_thumb.jpg

Link to comment
Share on other sites

UPDATE - 160219


Door Panel Update.


160219_Door_Panels_1.jpg


160219_Door_Panels_2.jpg


Custom pressed grills and custom baffles are next on the build for these panels, then all items will be wrapped in matching vinyl and accents.


The baffles will be attached to the doors which will allow the door panels to be removed as normal without the added weight of the baffles and speakers.


Stay tuned, more on the way...............

Link to comment
Share on other sites

  • 2 weeks later...

UPDATE - 160229


OEM Vinyl applied to door panels. Waiting on Inlays to come back from paint. Inlays are being sprayed with color matched graphite to match OEM parts.


160229_Door_Panel_Build_1.jpg


As always, more to come......

Link to comment
Share on other sites

Damn dude you have some serious skill!


How about helping me devise a new door panel for my dog cruiser build? :)


How are you going to finish the outside when its done so it looks like a nice finished part?


The skill in fabrication goes to my friend Kyle Golden. I do the installation, but he is the craftsman. Design was by me and fine-tuned by him as the build progressed.


Not exactly sure what you mean by "the outside" and "finished part"?


Thanks for the comment.


MD

Link to comment
Share on other sites

I was wondering how you finished the bottom panel you cut a hole in for the bigger speaker. Just paint? Looks like a stock part.


Kyle used OEM Black Vinyl to match the interior. We have found that even though I have the leather interior, several panels have a mixture of leather and vinyl. You can tell in direct sunlight, because they are different shades of black.


The baffle has not been installed to my doors yet. Baffles are cnc'd from different plastics he uses for stability. It will be mounted to the door and the door panel will work as a normal door panel does without the baffle being attached. No cutting of metal on the door needs to be done.


The trim surround you see in previous pictures will be covered as well, with a pressure fit custom grill. Right now we are having trouble finding a big enough piece that matches my A-Pillars.


If you look at the Top/back of the speaker opening there are inlays that are also pressure fit.....that's what i was referencing as to being at the paint shop for graphite finish.

Link to comment
Share on other sites

Quick question about dual battery setup. How much 0 gauge wire do I need? Stuff is expensive so want to order just enough.

Oh shoot, you would have to ask me that! Lol.


I am not sure exactly, because I just ordered a 50ft spool of Stinger Pro 1/0 Red translucent and 35ft of Stinger Pro 1/0 black translucent. I think I have like 15ft of red left over. I ordered more than I need so when I was running cables I wanted to make sure the cable runs were all longer than needed, then cut down to custom length.


I ordered on amazon from darvex when it was $95 per 50ft spool, I just checked and it's 135 now.....it's still way cheaper than if you go to a local shop. I know....support your local shop etc etc, but business is business and if they are not willing to compete with the options out there, then they lose business on large quantities......the cost of business...


Anyways, I will tell you that in most instances, you should be able to get away with using 4 gauge. My buddy Kyle uses two runs of 4 gauge from front to rear for his amps. I chose 1/0 for the simple fact my amps are high current and a single 4 gauge was not enough, and I didn't want to run dual 4 gauge. I planned for a single run, and never wanted to have to think twice about it.


Hope that helps.....stay tuned!

Link to comment
Share on other sites

I saw 4 gauge at tractor supply today and its pretty thick, I cant imagine how thick the 0/1 is, but I want thick cables going to the battery as I am powering a fridge and probably an inverter for household plug items.


My fridge should be here soon and thats going in the back seat next to the dog cage. I will probably only run 8 gauge to that, not sure how thick I should run to the inverter tho maybe 4?


How do you run cables to back seat area? Under the plastic things along the floor edge?


Cant wait to get the stinger isolator and second battery installed. Stinger on the way still looking for battery tho, what is biggest size I can fit in the empty bay? I need a deep cycle AGM battery for my uses.

Link to comment
Share on other sites

I saw 4 gauge at tractor supply today and its pretty thick, I cant imagine how thick the 0/1 is, but I want thick cables going to the battery as I am powering a fridge and probably an inverter for household plug items.

My fridge should be here soon and thats going in the back seat next to the dog cage. I will probably only run 8 gauge to that, not sure how thick I should run to the inverter tho maybe 4?

How do you run cables to back seat area? Under the plastic things along the floor edge?

Cant wait to get the stinger isolator and second battery installed. Stinger on the way still looking for battery tho, what is biggest size I can fit in the empty bay? I need a deep cycle AGM battery for my uses.


Not sure on battery size, as you can see in my build I used an Optima 800....as far as running the cables, use the factor grommet through firewall. If you don't have a through firewall driver tool, you can use a really long screwdriver (tape up the end so it's blunt) and pass it through the grommet and firewall to trace the path, then on the second pass tape the cable to the tip and run it again.....once through you can feed it right where you want it.


Totally depending on cable gauge you can use the channels if there is room, I ran the cables through the inside of the footwell towards the center of the vehicle, through the seat mounts, then followed the contours of the floor pan to the back....you definitely can't see that it's there.

Link to comment
Share on other sites

My fridge is behind the passenger seat so running cables down the center will probably be best bet. Should I be good with a tent pole and wire snake for the routing? Also, do you know if the stinger prevents the second battery from charging until the main one is topped off? I have read this is a good feature to have as it reduces stress on the alternator. How solid are the alternaters in our truck? Should I worry?

Link to comment
Share on other sites

Archived

This topic is now archived and is closed to further replies.


×
×
  • Create New...

Important Information

By using this site, you agree to our Terms of Use.