Jump to content
  • Sign Up

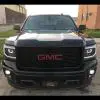
Strykers_Inc 2014 GMC Sierra Denali 6.2L (Vader)


Strykers_Inc

Recommended Posts

W0W! Im no car audio guru but ive seen alot of installs and setups but none of them as clean and perfected as this one.

Thanks comments appreciated. Just trying to do the best job on this project I can with a reasonable budget. Luckily Kyle is a friend of mine otherwise I couldn't afford the fab work as fast as it's getting done.


Soldering connections today. Cut a lot of the cable lengths down to custom fit everything in the rack. Note to self: The RMD cables are a bitch, not doing that again. Cut those down from 12ft, to less than a foot. The connectors look like RJ45 connectors but they are not. Finished the custom fan control harness and Still have the mercury switch harness to finish also today.


Received black mounting hardware from Fastenal yesterday and waiting for 3x Knukonceptz Krystal Kables. I figured I would go ahead and run them from the head unit back to the Mosconi dsp in preparation for the Alpine x110 install later. The plan is to get everything running using line-out/line-in from the Bose to the Mosconi until I get my hands on the x110, then complete the system with that badass head unit.


Stay tuned......

Link to comment
Share on other sites

  • Replies 464
  • Created
  • Last Reply

I can't wait to sit in this thing and experience the arrhythmia that sub is sure to provide..


Thanks for the comments.......


"Arrhythmia"


Well I don't know about that.....I am a sound quality guy with just a touch of basshead (meaning you will know its there for sure).....just wanted to use that particular sub no matter what, so it kind of formed the design of my system in order to incorporate it. I will be passing through again in a month to pick up door panels (and at least one m ore trip for the X110) so we will have to do another "Red Robin" night! LOL

Link to comment
Share on other sites

Love the build thread, lots of great info for a new truck owner and DIY'er.


So i notice you have a Optima 800 red top for your 2nd battery. Any reason you chose this over a deep cycle marine battery?


"Back in the Day" I had an 800U Optima Battery from Phoenix Gold car audio. It was labelled Phoenix Gold and everything even though it was this same exact version. Although Optima says I should be using the Yellow Top battery for what I want it to do, I still find that the red tops perform better in car audio installations. I am not going to quote any scientific data, but it seems to just handle the load better and maintains its charge. Now for what you want to do with it, I believe the yellow tops would be your choice.


BTW, I never run anything on the battery alone for very long anyways......At full load my amplifiers will pull 210Amps.....the second battery is mostly there as a precaution since I will never try to get the full 210 load.


Link to comment
Share on other sites

Just wanted to chime in and tell you you have one killer truck!

Congrats on all you've done!

Thanks, appreciate the comment! Stay tuned much more to come!

Link to comment
Share on other sites


Folding Seat Mod

151102_Folding_Seat_Mod1.jpg

151102_Folding_Seat_Mod2.jpg


Yes... Lifting the seat bottom up unmatched the setback. Seat back and bottom can then fold down. The reverse procedure locks it back in place. It's secure, the remaining metal is all the way down on the metal bracket on the back wall, so instead of having about 2.5 inches of metal in the bracket you have half of that. Make sure to round the edges well before reinstalling so it doesn't hang up.


can you elaborate some more on this mod? i have yet to take the interior apart but i may be over thinking how the seat works.


i am guessing with that second description that the full length of the seat bracket keeps the seat in the wall mounted slot and prevents it from folding down. with the motion of the seat bottom being pulled up moves the seat back up and releases it from the slot the bracket is held in place


then shortening the bracket is just enough for the motion of the seat back to move up enough to clear the slot it is kept in from the factory preventing it from folding down correct?


and since you said the bracket is 2.5", you cut off 1.25" from the seat back bracket?


also, can you also do this to the passenger side seat? i noticed in the video you only did the driver side.

Link to comment
Share on other sites


can you elaborate some more on this mod? i have yet to take the interior apart but i may be over thinking how the seat works.


i am guessing with that second description that the full length of the seat bracket keeps the seat in the wall mounted slot and prevents it from folding down. with the motion of the seat bottom being pulled up moves the seat back up and releases it from the slot the bracket is held in place


then shortening the bracket is just enough for the motion of the seat back to move up enough to clear the slot it is kept in from the factory preventing it from folding down correct?


and since you said the bracket is 2.5", you cut off 1.25" from the seat back bracket?


also, can you also do this to the passenger side seat? i noticed in the video you only did the driver side.


Yes, the shortening of this bracket is giving the bracket just enough clearance to come up out of the slot holding it to the back wall.


For measurements, Take a look at your bracket and gauge it off of my photo. (copy the photo onto your desktop and zoom in may help you see a little better) Use the holes already in the bracket as a reference.


Yes, only the driver side was done, in order to gain access to the power distro rack. The passenger side has stock electronics and power window motor located there and only 1 bracket (instead of 2) so I decided to leave it alone.

Link to comment
Share on other sites

How much did it cost to have your grill and lower fairing painted? Assuming any professional and reputable body shop could do that....unsure of the prep work needed to paint over chrome?

Most all painting was done by myself. The lower valance was done at a gm paint shop for $75. I did all the prep scuffing all the chrome and primering and scuffing again. The paint shop prepped it again before spraying.

Link to comment
Share on other sites

Archived

This topic is now archived and is closed to further replies.


×
×
  • Create New...

Important Information

By using this site, you agree to our Terms of Use.