Jump to content
  • Sign Up

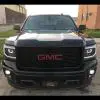
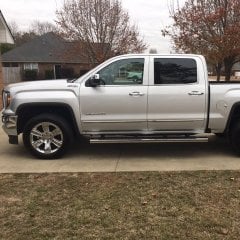
Strykers_Inc 2014 GMC Sierra Denali 6.2L (Vader)


Strykers_Inc

Recommended Posts

So here's my build thread. The truck was ordered in 14 February 2014 and Delivered 17 April 2014.


Mods Completed

------------------------------------------------------------------------------------

Black Rhino Letaba 22x9.5 Wheels (Black-Lugs)

GMPP Bridgestone 285/45R22

GMPP Borla Exhaust (Black Chrome Tips)

Line-X

SnugTop SnugLid

GMC Bed Liner

AMP-Research Black BedXtender

WeatherTech Floormats Front&Rear

Headlights Blacked Out

Morimoto HID ELite System kit

Morimoto Halos

HighBeam/Foglight Mod

Color-Matched Handles & Trim

Custom Billet Pedals (PerformancePedals)

Carbon Fiber License Plate Security Frames (Front&Rear)

3m Carbon Fiber Wrapped Mirror Covers

3m Carbon Fiber Wrapped Running Boards

S&B Air Intake

BBT

Lower-TowHook Surround Painted

Denali Grill Painted

Tailgate GMC debadged

All emblems Black Chrome finished


Mods To Finish (Parts on Hand)

------------------------------------------------------------------------------------

StopTech Drilled Rotors (Black-Powder-Coated)

Calipers Painted

Hellwig Front Swaybar

Hellwig Rear Swaybar

3M Carbon Fiber Wrap Interior Panels

EGR Cab Spoiler (ColorMatched-Painted)

Black Chrome Black Rhino Centercaps

Black Chrome Hitch Cover


Future Mods

------------------------------------------------------------------------------------

Custom Subwoofer / AmpRack Enclosure

Looks mean !!!! Very nice
Link to comment
Share on other sites

  • Replies 464
  • Created
  • Last Reply

Was going the motorized route, but decided against it due to limitation in space....kinda holding back on pictures until we complete this phase. I can only say it's different than anything out there, and it will show pretty nice with some really quality craftsmanship.


Removing the rear block is an option I am looking into as well as a set of belltech shackles, just don't know yet as to how it will effect bilstein 4600's.....


Yep, I have been stockpiling parts until spring, want to get the audio done first since it's all interior. Not looking forward to leaving my door panels with Kyle next month and losing control of windows....LOL...I have to roll them down every day to get through security checkpoints.....gonna be a hassle explaining..lol


damn, that motorized system you had planned was gonna be awesome.


Theres no way you can keep a switch or put in a temporary switch so you'll still have control of atleast the driver window?

Link to comment
Share on other sites

damn, that motorized system you had planned was gonna be awesome.


Theres no way you can keep a switch or put in a temporary switch so you'll still have control of atleast the driver window?

Not sure yet...all I know is my doors will be bad ass when Kyle gets done with them.....the illusion 8 inch drivers are going there with trim to match both the a-pillars as well as the carbon...

Link to comment
Share on other sites


damn, that motorized system you had planned was gonna be awesome.


Theres no way you can keep a switch or put in a temporary switch so you'll still have control of atleast the driver window?


Here is a picture depicting what the CNC'd curves belong to. Still have to add a few more details, then foam, sanding, flocking, and primer.

151008_1_Amp_Rack.jpg

Link to comment
Share on other sites


damn, that motorized system you had planned was gonna be awesome.


Theres no way you can keep a switch or put in a temporary switch so you'll still have control of atleast the driver window?


Started the shaping process with foam, filler, and primer.

151022_1_Amp_Rack.jpg

Link to comment
Share on other sites


damn, that motorized system you had planned was gonna be awesome.


Theres no way you can keep a switch or put in a temporary switch so you'll still have control of atleast the driver window?


Finished the RMD (Remote-Voltage-Display) housings and are being incorporated into the enclosure in order to display real-time voltage at the amplifier inputs (2-amps/2-rmd's). These will be covered with smoked lexan so only the led's are exposed.


AMP_RACK_151025_0.jpg


AMP_RACK_151025_1.jpg

Link to comment
Share on other sites

Power Distribution Box


Had a fab shop make me a metal box with welded flange to make a power distribution box for car audio components. The product I recieved from this fab shop was less than desirable, but with a crap-ton of sanding I finally have something that is going to work rather well.


Finished Sanding, adding Rivet-Nuts, and Drilling holes for cable routing

151022_Distro_Rack_Unpainted1.jpg

151022_Distro_Rack_Unpainted2.jpg


Fuse Distribution Brackets

151022_Fuse_Brackets_Unpainted.jpg


Powdercoat in a Can (VHT Black Satin Epoxy)

151023_Distro_Rack_Painted1.jpg

151023_Distro_Rack_Painted2.jpg


Test Fit for clearances

151102_Distro_Rack_Mockup_TestFit.jpg

151102_Distro_Rack_Seat%20Clearance.jpg


Folding Seat Mod

151102_Folding_Seat_Mod1.jpg

151102_Folding_Seat_Mod2.jpg


Now I have to pull it back out, alcohol it down, give it a final coat of epoxy, add bushings, install components, and begin running cables. Once that's complete I will permanently mount it with threadlock and move on to the next item on the list.


....Stay Tuned there is more to come......

Link to comment
Share on other sites

UPDATE 151106


Car Audio Build - Main Power Distribution


Stinger 200A Isolator w/custom mount
Shok Industries 1/0 Fuse Holders (Stinger Pro 250-Amp Fuses) w/ custom mounts
Phoenix Gold Zeropoint 1/0 Compression Terminals
Phoenix Gold 1/0 Ring Terminals
Phoenix Gold 12ga Ring Terminals

Phoenix Gold 12ga .250 Quick Disconnect & Parts Express Fuse tap
KnuKonceptz Battery Terminals
KnuKonceptz Heat Shrink
KnuKonceptz 1/0 Grommets
Techflex Pro
Stinger Pro 1/0 Cable for Main Power and Ground
Shok Industries 12ga cable for Isolator Power and Ground


151106_Power%20Distro_001.jpg


151106_Power%20Distro_002.jpg


Modified the original GM fuse tray to route 1/0 cable (added cable channel and grommet)
Used KnuKonceptz Negative Battery mount in order to allow for 1/0 ground to be used for isolator loop151106_Power%20Distro_003.jpg


151106_Power%20Distro_004.jpg

GM fuse tray cover fits as normal once channel is cut with dremel tool and grommet added for a little more protection151106_Power%20Distro_005.jpg

Auxiliary Battery connected to isolator via Stinger Pro 1/0 and KnuKonceptz Battery Terminals151106_Power%20Distro_006.jpg

Cable Run from Auxiliary Battery to Car Audio system uses another Shok Industries 1/0 Fuseholder with Stinger Pro 250-Amp Fuse
(Still have to run the 1/0 cable into the cab and finish connections to aux battery)

151106_Power%20Distro_007.jpg


.....and I really need to clean the engine bay!


More to come so stay tuned......

Link to comment
Share on other sites

UPDATE 151108


Car Audio Main Power Distribution


*Finished cable routing of main 1/0 power cable through firewall using the GM Factory Firewall grommet and to rear of cabin using GM cable tracks.

*Finished cable routing of the 12 Gauge Phoenix Gold Speaker Cables for driver side of truck.

*Finished cable routing of the Mosconi 6to8V8 Controller cable into driver side dash

*Finished cable routing of the Phoenix Gold ZRDT-3 Remote Diagnostics cable into driver side dash


Stinger Pro 1/0 Main power cable for power distribution block (will add the 250A fuse when I get to connecting the main block)

151107_Power%20Distro_001.jpg

Link to comment
Share on other sites

UPDATE 151113


This update will show a little more of what I have been working on with my car audio install. I wanted to do something different, and with the major help of Kyle Golden, I feel this is definately different without sacrificing too much. My amplifiers and system components are way too much to install on the back wall due to existing electronics which I did not want to remove, and I did want an underseat enclosure done by Kyle since his craftsmanship is quite remarkable! So an enclosure is what we came up with, but the main enclosure is for my Phoenix Gold Elite's with a temperature controlled fan system. The sub enclosure is different as well because I did not want to compromise with shallow mount subs. I do like the Illusion Audio Carbon 10's and 12's, but the Phoenix Gold Elite2.12D2 is what I wanted and do to its structure required a much taller enclosure. So we came up with a center mount single enclosure built to the sound quality specifications of the manufacturer.


The following pictures are somewhat of a timeline of what has been completed so far. I think it will give everyone an idea of what is to come. BTW all test fitting was done in my truck, but as seen in the pictures, Kyle uses his Silver-ay-do during the fabrication process.


Laying out the Elite.4 and Elite.5 amplifiers (yes, both are beasts and provide me with 9 channels for a fully active setup)151006_0_Amp_Rack.jpg


151008_0_Amp_Rack.jpg


The internal amp rack frame will be reinforced with a steel frame prior to amp install151008_1_Amp_Rack.jpg


151008_2_Amp_Rack.jpeg


151008_3_Amp_Rack.jpeg


Just enough room on each end for cable routing151008_4_Amp_Rack.jpeg


Just enough room on the front end for fan placement151008_5_Amp_Rack.jpeg


The sub enclosure coming to life. Resin Reinforced.

151013_Sub_Enclosure_1.jpg


151013_Sub_Enclosure_2.jpg


151013_Sub_Enclosure_3.jpeg


Jigs made for Lexan Window Frames and LED Frames

151016_2_Amp_Rack.jpg


Mock-Up for Amp Rack Windows

151016_5_Amp_Rack.jpg


151016_3_Amp_Rack.jpeg


151016_4_Amp_Rack.jpg


Test Fitting to figure out a mounting system. The Sub enclosure is mounted to the rack with a swivle type system to get it squared up.151019_1_Amp_Rack_Enclosure_Fitting.jpg


Seats Down and the Sub enclosure is all that is seen151019_2_Amp_Rack_Enclosure_Fitting.jpg


Foam Shaping the rack exterior

151022_0_Amp_Rack.jpg


151022_1_Amp_Rack.jpg


Jig created for Phoenix Gold RMD Mounts (Remote Voltage displays for the Elite amplifiers - each amp has one)151023_1_RMD_Pod.jpg


151023_2_RMD_Pod.jpg


Final RMD mount made from composite material

151023_3_RMD_Pod.jpg


RMD Mounting position cut into rack enclosure

151023_4_RMD_Pod.jpg


151023_5_RMD_Pod.jpg


151023_6_RMD_Pod.jpg


151023_7_RMD_Pod.jpg


Cooling Fan Mounts/Ports finalized in composite material151024_1_Fan_Pod.jpg


Cooling Fan ports cut into rack enclosure

151024_2_Fan_Pod.jpg


151024_3_Fan_Pod.jpg


151024_4_Fan_Pod.jpg


151024_5_Fan_Pod.jpg


151024_6_Fan_Pod.jpg


151024_7_Fan_Pod.jpg


Another Test fit

151102_Sub_Enclosure_0.jpeg


The Sub enclosure in Primer

151102_Sub_Enclosure_0.jpg


151102_Sub_Enclosure_1.jpg


151102_Sub_Enclosure_2.jpg


The Amplifier Rack Windows in Primer

151113_1_Amp_Rack.jpg


The Sub enclosure getting wrapped in GM Color Matched Vinyl (Still working on the bottom and inlays)151113_Sub_Enclosure_0.jpg


The inlays are wrapped in 3M Carbon 1080 in order to match the accents in my truck (BTW was going to go with real

carbon fiber which Kyle makes in-house, but that would require me to do everything I have on the truck to be done

in order to match - and I am not a gazillionaire)151113_Sub_Enclosure_1.jpg


Stay tuned there is soooo much more to come......


(I do welcome comments, but please don't quote this update because its so long)

Link to comment
Share on other sites

how does the seat work with half of the bracket cut? folds down completely once you raise the bottom portion up? completely latched safely when its folded down in the sitting position?

Link to comment
Share on other sites

Archived

This topic is now archived and is closed to further replies.


×
×
  • Create New...

Important Information

By using this site, you agree to our Terms of Use.