Jump to content
  • Sign Up

How-To: PIAA 540 Fog Light Install GMT900 Sierra.


davisenglish@hotmail.com

Recommended Posts

I couldn't find much detailed info when I was looking, so thought I'd put some out now that i've completed (almost completed)


You'll need a sockets, wrenches, screw drivers, sharp knife or dremel tool, wire crimp bits and pieces, more zip ties, elec tape, drill with 1/4"ish drillbit.


I used PIAA 540 crystal ion Fog lights.


My 2011 sierra had no fog lights, the holes just had the round air dam insert. First you'll need to pop those out; from behind, release tabs, push forward.


PIAA makes an overpriced vehicle specific fit-kit (part number 30370) for the 07-09 sierra, but it works for the 2011 very well. The kit consists of two flat bars, bent and drilled appropriately, hardware, terrible directions, and a PIAA sticker. I chanced upon a 1/2 off PIAA sale, so the $50 'kit' was more reasonable at $25. If you have access to metal working technology, you could take a look at the kit and fabricate them in 30 min.


Before you install the bars, you'll need to make the square opening in the bottom of the plastic housing 1 inch bigger towards the centre of the truck. This is so the base of your PIAA lamp contacts the mounting bar nice and flat.


post-102113-0-86415500-1323047204_thumb.jpg


The 30370 bars are stamped R and L for right and left side of the truck. Their orientation is a head scratcher for a few min, but is plain as day when you get it. Remove the elevator bolt which holds the bumper bits together, slip the longer end of the bar on the top and re-nut. The other end connects to the rear of the light housing with the supplied nut, bolt, washer. Tighten the bar in place.


Pop the PIAA cover grills off the lamps and dry fit the lamps in place. Make sure you trimmed enough plastic, and mark where the aiming screws end up. You'll need to drill some small holes to slip a screw driver in for aiming the light afterwards.


Time to install the lamps. The 540 series fits well without the PIAA protective grills. Correct me if i'm wrong, but I don't think they would fit with them on. If you want the covers you may have to go with the 510 series lamps (smaller) to fit it all in there.


Feed the wire through the back of the fog light housing, and the stud on the lamp into the hole in the bar, nut and tighten.


The wiring is pretty straight forward. PIAA supplies a harness that even my girlfriend could figure out (with help from the dog). Positive and Neg to the battery, secure the fuse and relay in an upright position to mitigate water/grime infiltration. Don't do anything dumb, like drill and mount the relay to the side of the battery; I know it looks like a nice clean spot.


I like to keep my engine compartment clean, so I tuck all wiring into black wire loom (available at any auto parts store).


Route the black and white remote leads into the cabin. I put mine through the rubber boot at the steering column, if anyone has a better route let me know. Most other vehicles I've owned have a rubber grommet in the firewall somewhere for this purpose, but I can't find one in this truck. The third wire that's loose and has been a pain in your ass this whole time, is the power for the remote. The PIAA remote won't work without it; It's not just for the LED.


I cut the PIAA remote off and used a different switch. I would include a picture, but the skiing is too good and I haven't completed yet, maybe sometime in May. It's currently wired and working, but sliding around on the dash.


post-102113-0-47455700-1323050052_thumb.jpg


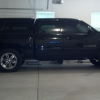
The extra light helps in low visibility fog, snow etc. and also adds width to the low beams; The deer in the ditch agrees. I'm not crazy about the blueish look of the lamps when they're off, but the yellow light works really well at cutting through snow. I hope this has helped you with your install. Thanks for listening.

post-102113-0-86415500-1323047204_thumb.jpg

post-102113-0-47455700-1323050052_thumb.jpg

post-102113-0-86415500-1323047204_thumb.jpg

post-102113-0-47455700-1323050052_thumb.jpg

post-102113-0-86415500-1323047204_thumb.jpg

post-102113-0-47455700-1323050052_thumb.jpg

Link to comment
Share on other sites

  • 2 months later...

Archived

This topic is now archived and is closed to further replies.


×
×
  • Create New...

Important Information

By using this site, you agree to our Terms of Use.