Jump to content
  • Sign Up

Completed RC 2" leveling kit installation


Recommended Posts

I installed my RC 2' leveling kit yesterday. Overall, it wasn't too bad. I did the passenger side first and it took a while to get it all lined up. The driver side went much more smoothly. I found a video on Youtube and followed that. Basically you just loosen the sway bar bolt and upper ball joint nut but leave them connected. I removed the nuts, then put them back on just a few threads. The ball joint took 5 or 6 good taps with a regular hammer, but popped right off. When you jack the truck up, make sure to get the tires a couple inches off the ground. When you install the RC spacer, it lowers the lugs. I usually jack it up until the tires are just off the ground and had to jack it up further the get the tires back on.


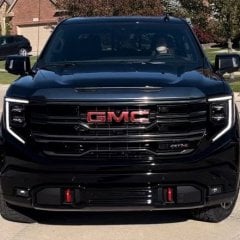
I measured both sides before and after and found that I only picked up 1.5". I'm OK with that, i got the look I wanted. I still have a slight rake to the front, but I will play around with the rear airbag pressure a little to level it out more if I want. I drove it to get it aligned this morning and checked the steering from lock to lock and had no rubbing at all with the stock 20" tires. Reminder, get an alignment!!! The leveling kits will change the geometry slightly, mainly the toe setting. Mine was off slightly as I expected. The tech said it wasn't off much, but it would have destroyed the front tires over time and it's a quick adjustment. Also make sure to retorque the nuts after you install the leveling spacer.


Overall, I'd rate the job about a 5 out of 10 on the difficulty scale. It took me about about 90 minutes from gathering tools to putting them away. You can do it by hand, but it will take longer.


Here are some before and after photos...


Link to comment
Share on other sites

Archived

This topic is now archived and is closed to further replies.


×
×
  • Create New...

Important Information

By using this site, you agree to our Terms of Use.