Search the Community
Showing results for tags 'Wt'.
-
Hey all, first post and hoping this can help out. As many of you know and or finding out, the 24's and up are apparently a new style Firewall Grommet system leading into the truck from behind the battery. But not to worry, this will hopefully be the clearest new how to so far without a youtuber making a video of this. The truck now, instead of having a nipple coming from the firewall grommet on the engine bay side, is now a plastic bezel. The nipple can be located from under the dash still, however, and is still just as easy as an install as before. Pic 1 is from the engine bay. You can see the channel where the wire will exit/enter the truck. Pic 2 is from inside the truck and what is looks like if you peel the grommet back, which does not need to be done because then you'll need to replace the rubber around the grommet to around the plastic shroud which is not the easiest thing to do. Just use an exacto #1 and cut a plus from the inside of the truck in the nipple. Pic one shows where the wire will exit. Pic 3 shows a 4ga wire in it. It fits 4ga wire really well. No sure about 2 or 0... you may have to trim the nipple off then just make the plus/X cut bigger. I also did not need to remove the battery to do any of this. Just work from mid engine with a ladder/step stool. Not the side of the truck. Step 1. Take out the multifunction power supply converter box and bracket that is located behind the glove box and bolted to the kick panel right underneath the firewall grommet. The two tabs holding this box in need to be pulled towards you (the rear of the truck) and slid up. They will be blocked by the A/C fan I believe it is, but nevertheless cannot be pulled all the way up enough. Carefully pull it out. You'll have to finagle it a bit, but the box will come out. This is the only way to access the second 10mm nut that's on the stud holding the bracket in place. You do not need to remove the wire harness. I didn't. Remove both 10mm nuts with an extended socket. Step 2. I used an exacto like #1 blade and sliced a plus sign in the power wire pass through nipple. Step 3. Electrical tape a long zip tie to the wire. Use a little soapy water or some lubricant (I used just a little petroleum jelly) to slide the power wire through the hole. I went from the inside of the truck and pushed it to the outside (inside the engine bay). Continue install as you would with all the other older amp/power wire install guides out there. ...Special Notes... You may need to remove the plastic cover kickplate that is plastic welded to the floorboard part of the carpet placeholder cover. I did this by removing the fuse box cover plate then removing the 8mm screws. This allows you to pull the panel backwards and pop out the kickplate. The floorboard part must be pulled upwards. Do not try to separate these two pieces at the seam! They are plastic welded together. For another good run through check out here: https://www.trailboss.org/threads/firewall-grommet-change-in-the-2024-lt-trail-boss-for-power-wire.2109/ Hope my photos are more helpful.
-
I have a 09 silverado 1500 WT It has heated rear window but no heated mirrors. And I can't see a wire for heated mirrors in the door compartment (although I haven't opened the door panels in a few months) I do seem to have 2 wires (it feels like 2) going through the door boot (I haven't opened the boot to see the colors but I assume it is for the door open sensor, but I could be wrong) I am wanting to add tow mirrors to the truck and especially heated mirrors ( I plow with the truck and really would love the heated mirrors) I was wondering how I would go about adding heated mirrors ( like I said I have the heated back glass so shouldn't the wiring for heated mirrors already be in the truck as I think they run off the same switch and I'm gonna assume the same harness ( I could be completely wrong and they could be different harnesses) Looking for help as I am wanting to do this conversion if possible
-
Hi everyone, So since my purchase of a 2016 Silverado 1500 in May the main problem I've had with the truck is its inconsistent ride quality. The truck is a WT with power windows and locks. Cloth seats. And vinyl floor. The truck only has 27000 miles, well kept and maintained. Used as a commuter truck to work, aswell as work on the side (Electrician). Truck was purchased with only 22000 miles on it. No issues other than leaking pinion seal which is in the process of being fixed. At first I thought it was the tires so I had them balanced, rotated, and had an alignment done. While that helped it didnt fix the issue at hand which is how hard this truck drives It's a very uncomfortable ride at all speeds. Even on freshly paved highways and roads it still drives rough. What defines "rough" is the hitting of minor bumps. It can be just an ever so slight crack in the road to minor pits. I've done some testing and drove another vehicle (An f-150) down those same roads and had no where near as much of a impact and hit as my own truck. Now it's not a major impact like hitting something that you really shouldnt. But it's very unsettling and jarring at times as you would be driving the same roads you have been for years in different vehicles, and when you least expect it feel a nice jolt in your back when you usually wouldnt. If you need more understanding, put a handful of change in the compartment under the AC controls and drive around. I was wondering if it has anything to do with the stock suspension that comes along with the truck. Should I try out new shocks? Is there anything else I should try? I have no clue what to do and where to start but driving 45 minutes to work with the truck makes my back hurt as much as after an 8 hour day of work. Thanks
-
Got my hands on a 2020 Silverado 2500hd! Long awaited for me for sure, seeing that they are making their way on to lots. Lets start! Exterior: This particular truck I drove was a Work Truck. In person, the HD is much easier on the eyes, but the WT is, I feel, the least attractive. I think its the black grille treatment that puts me off. This truck had the 17" carryover steel wheels, wrapped in LT265/70R17 Firestone TransForce AT tires (yes, the carryover AT not the AT2). Options list was minimal, including the WT Convenience Package, Integrated Trailer Brake Controller, the AT tires and black bowties. Overall, the truck's exterior is very functional. The bed steps are genius. Sure, they don't tuck away like some aftermarket designs do, however as a result they maintain bed rocker ground clearance like there isn't even a step there. Now, I am personally not a running board guy, mainly for looks (and I think 1/2 tons and Colorados are too low stock for them), but this thing needs them! Definitely an increased step in height with the T1 over the K2 HD. Its noticeable. Also, the size increase is noticeable too. I think its within an inch or so height wise to a Super Duty, and the body is just as wide as one. They dwarf the K2 HD. I do think that the 18" wheels are a must for looks, as they run a 33" tire and suit the truck's profile much better than the 17" wheels do as a result of the 31.5" tire they use. The towing mirrors. Totally functional. I can definitely get behind the way they are mounted once you drive one. This one had the base tow mirror, so just heat and power upper glass. There is much better visibility in the A-Pillar to mirror sightline. I found the extending not what I thought it was going to be? Its actually positionally detented. You pull it out and it comes off the arm a touch and then hits the outer detent. No "in between" position, but that might be just because its the base mirror. Oh! Another interesting fact. No aluminum body panels anywhere that I could see. Its all steel. The hood, doors, tailgate, all steel. Honestly, I was expecting some aluminum somewhere, like the hood at least, maybe the doors. GM wasn't joking when they said it only shares the cab structure, otherwise everything was unique to the HD. The biggest giveaway to those keen enough to notice, is the "CHEVROLET" area on the tailgate. Its nowhere near as protruded on the gate as the 1500 gate. Interior: See 2019+ T1 1500. Don't expect anything different here. Its still a good interior ( I think), apart from some questionable material choices in spots. I will add one important bit. Anyone looking at a WT or Custom trim HD, make sure you sit in an LT or higher with a power seat. The hood is even higher yet than a K2 HD, and the tall front at the end of the hood can be a bit tricky. I'm 5'10" and felt the standard seat to be ok, but some more height would have been nice around a parking lot/close to other cars. The mirrors, see the exterior description above. Powertrain/How it drives: The big bit. This truck had the 6.6 L8T gas V8. For being as large and heavy as this truck is, that powertrain is much improved over the L96, and long overdue. I didn't time anything, but it can move quite well when you want it to. I pulled out from an intersection normally, hit 2nd gear and rolled right into it and it took off quick. The K2 HD dead feeling accelerator pedal is gone too (thank god) and the power feels in line with your right foot. Much better response. Mileage wise, I averaged 15mpg, I'd say 65/35 city-highway split? Even the 6L90 shifting is improved. Do I still hope they throw the 10L90 in it? Yep. But the 6L90 has been a strong unit, and the added power makes it a good package for the time being. The added wheelbase smooths the ride out a touch. Stiffness? Well, its an HD LOL and had 80psi in the rear tires, but it was still well behaved. Overall, a nice improvement on the K2 HD. Love the mirrors, love the power, the bed steps all around. Love the look more or less, could use some interior help for sure. Big thanks to Cavallaro Neubauer Chevrolet in Williamson NY for letting me borrow this beast! Link to the window sticker for the truck: https://www.cnchevy.com/f_WindowSticker?VIN=1GC4YLE79LF117398&cs:o=%window_sticker%&cs:o=%27WindowSticker%27
-
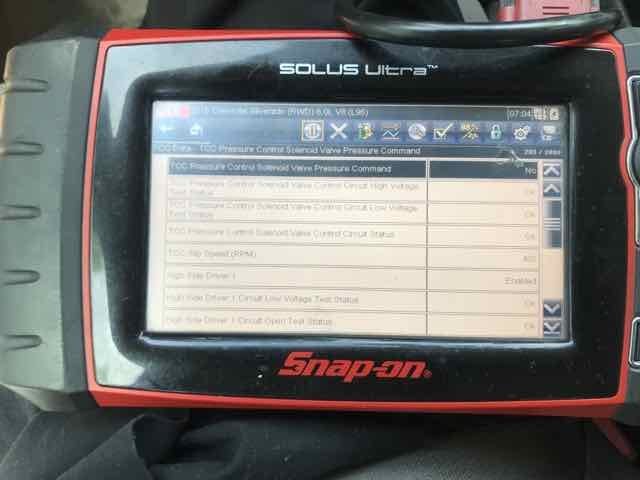
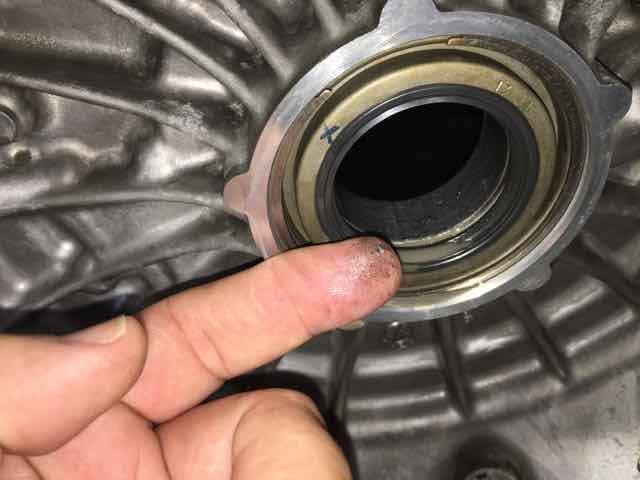
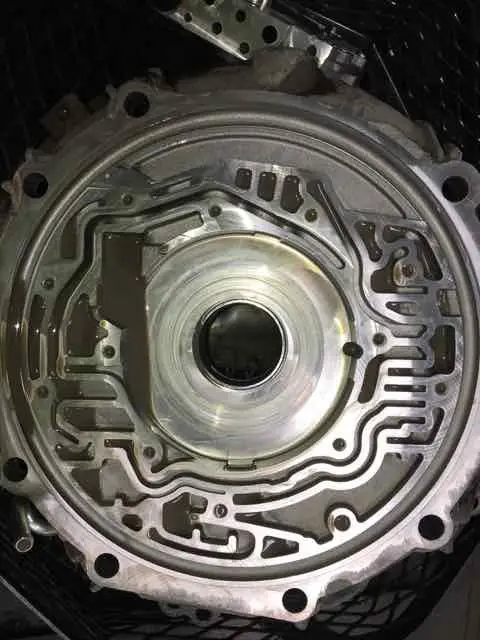
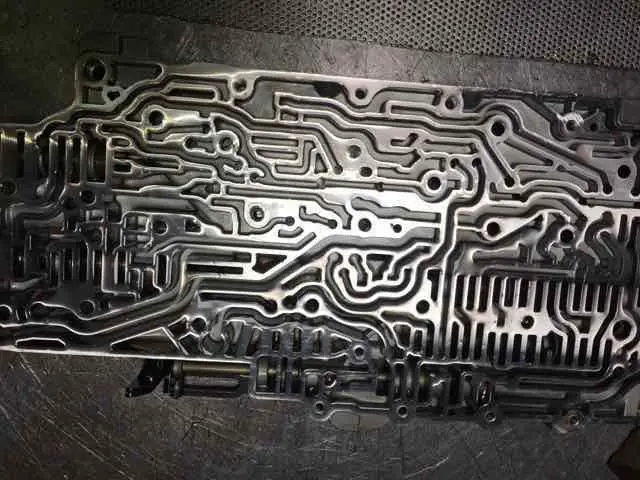
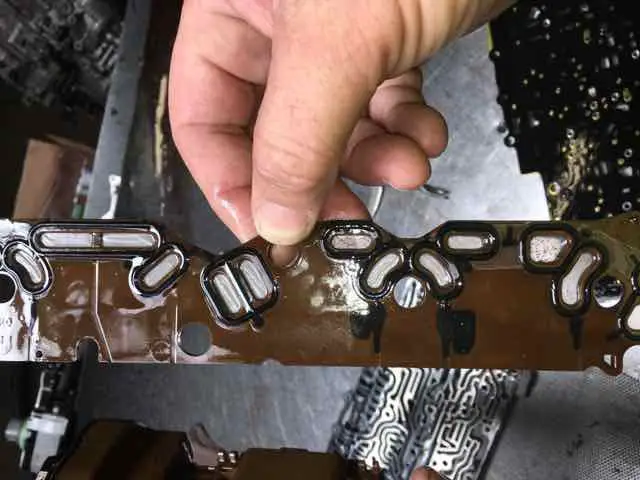
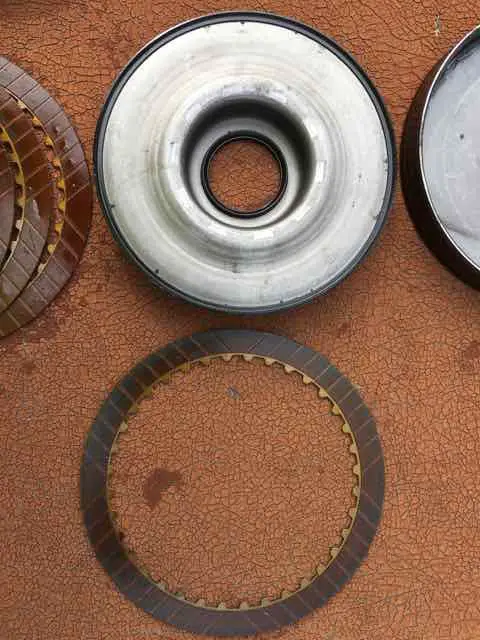
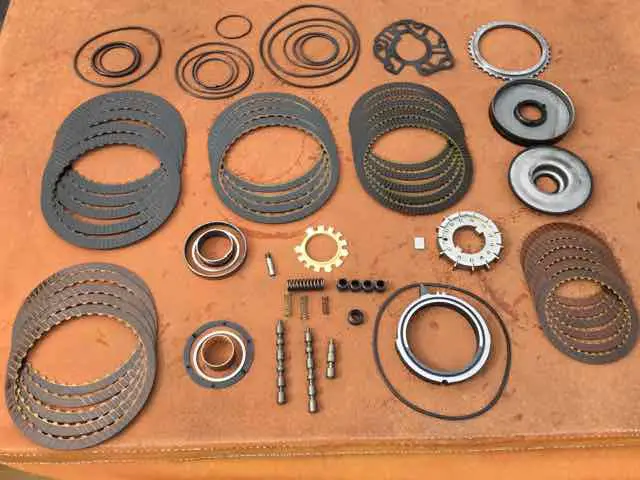
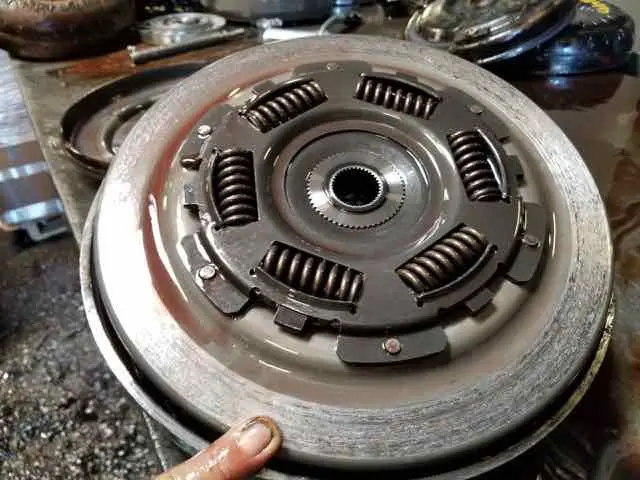
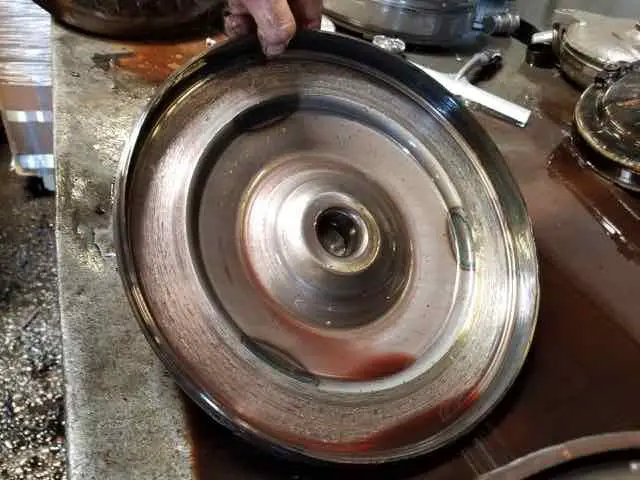
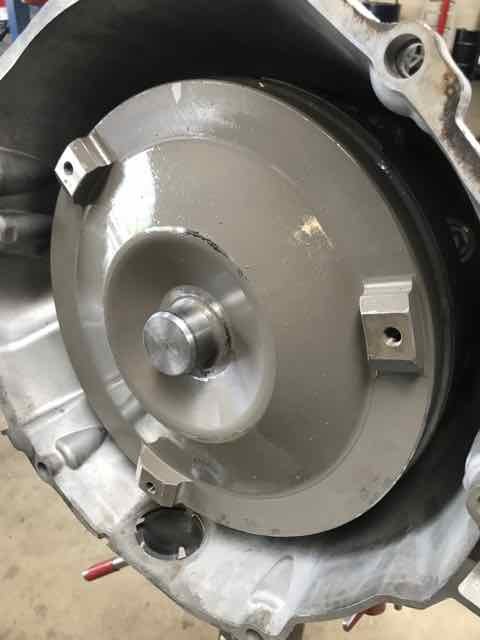
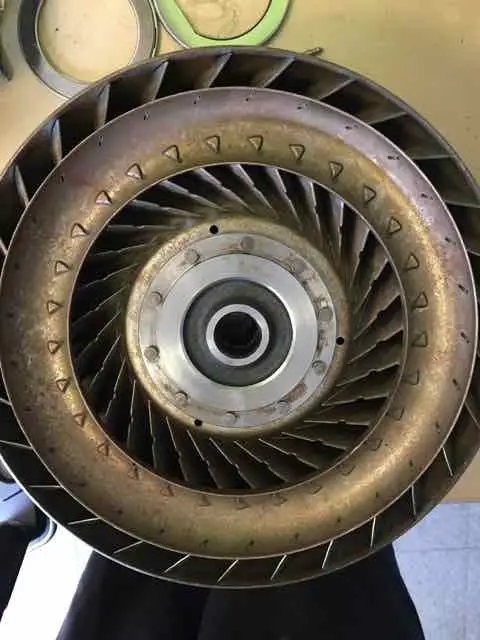
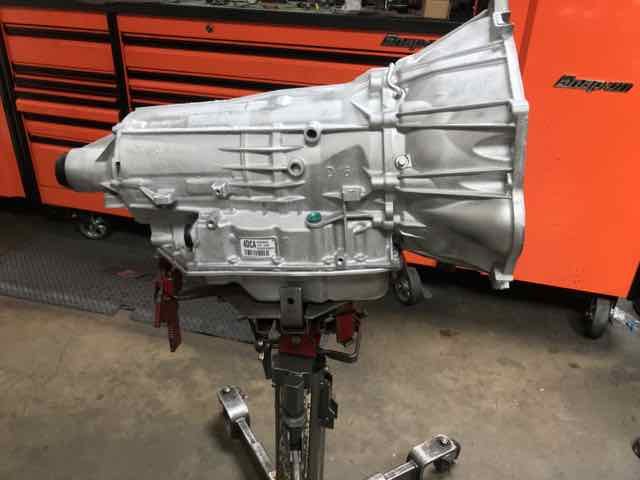
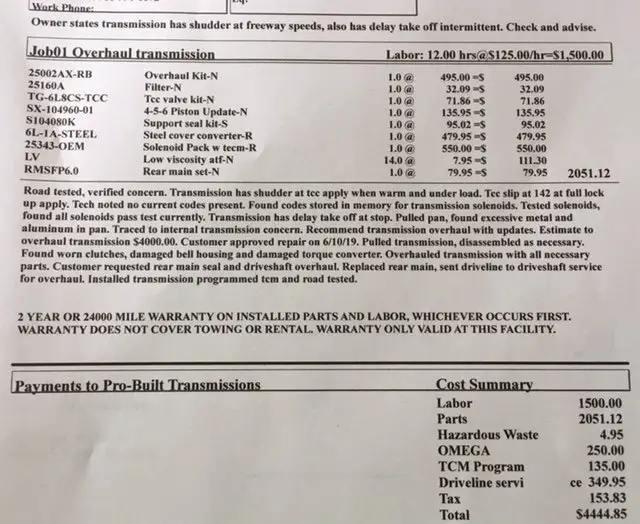
I sell, fabricate, deliver, install and train workers how to use my packaging lines. In 2015 selected 2500HD WT 6.0 as the platform to use as my office (Truck Camper) and and tow vehicle. It provided great HD service and economical (per mile basis). On a trip to OR noted a resonance with my thumb on the steering wheel, when engine load changed going over an overpass. At first I thought it was roadway groves, but the rhythmic vibration stopped when manually dropping into a lower gear, increasing to 3000 RPM's. Not willing to chance break down north of Mount Shasta, returned home, switch vehicles and headed north. Upon return the rebuild search began. Deep dived into transmission repair cave and almost selected a remanufacture unit from Certified Transmission but learned shops are under no obligation to use their products and there's limit participation on the left coast. Most shops refuse to install a third party transmission citing warranty issues. Finally settled on a local shop in West Sacramento that rebuilds your transmission to the level you want. As a bonafide cave dude wanting to understand the how transmissions work, why they fail and how to repair, called (late Friday) Pro-Built Transmission and spoke to Don the owner. I outlined in detail what the problem was, and through a series of questions from Don about the trucks' service history and how I use it, he was confident what the problem was. Arrived two hours late from my Monday 8 am appointment, Don pulled me through (no signage stating for insurance purposes you can see what we're doing to your ride gate) his shop showing various components, their failure points and although the 6L90 is a simple transmission pointed out common failure points. He showed various 6L90's requiring rebuild, some under 60K miles, and could not believe mine made it to 194K. I relayed after the first transmission filter change, started pulling 5.5 quarts out and replacing every other oil change, in other words, a poor man transmission flush. My reasoning was pay 25 dollars instead of $250 for a complete flush. Don smiled and said that explains it, noting above all else, fluid change saves transmissions. Satisfied Don wasn't a hack, dropped off the key and within an hour, after a test drive and noting data stored in in codes sent me this. I knew it was bad and knowing a bottle of shudder stop wasn't gonna fix this, authorized repair. With high mileage, I asked about universal joint replacement, Don relayed he had a shop that could replace joint, balance the driveshaft and check the center bearing. Also since transmission was removed, and although showing no signs of leakage, had him replace the rear oil seal as well. Don pulled the transmission and confirmed what he suspected, torque converter friction plate failure. The metal on metal grind produced fine grains that worked its way pass the bell hosing bearing and through the pump. Damage continued through the valve body and solenoid pack (TCM). Solenoids contaminated Note the metal grit in the screen on the right. What was unexpected was the metal grinds didn't make to the clutch packs. After 194K miles, 90% were still serviceable with some showing wear on the outer ring. What's interesting with GM is, instead of applying full pressure to the clutch plates, they control the amount of pressure applied. The black rubber ring on the piston drum engages the plate outer section. This accounted for the most wear on the clutch plate. Don showed how the replacement piston drum engages the full surface of the plate; provides a sharper shift and lowering the wear. THE FIX. Drive shaft showed the center bearing was bad and was along with universal joints replaced. Don sent the pump face (forgive if I don't name the parts correctly) to be machined smooth (8-9 thousandths). He switched solenoid rods from alloy to steel, and spoke about the OME cost. Chevy spends perhaps 50 cents on alloy rod where as three steel one cost him $80.00. He installed a new pump and higher valve pressure components. Here's a picture of some parts replaced in my 6L90. Don sent out the torque converter to another shop. They split it open and here's the condition. Don then explained his vendor replaces the back half (part the friction ring presses against) with a thicker (1/4 inch instead of the 1/8 inch) material machined from a billet. This handles heat better and prevents the converter material from warping. They also flash braze vane tabs to prevent movement (picture of open converter is not mine) If you get a good shop and can wait four days, one can retain the original unit and get upgraded parts. Note the remanufacturing industry is designed for a quick turnaround for transmission shops. They cite a higher level of expertise, however the reality is they created a process based on volume allowing a price point favorable to the transmission shops. Nothing wrong with that and note I wanted to retain my original transmission. Programming Invoice. Yes its high, but keep in mind two other shops were involved, addition work was completed and Don took time to educate me on the transmissions, AND its a tax write off. In the final analysis and under heavy duty conditions, if you have a 6L90 strapped to a 6.0 and do fluid changes, your transmission will survive to 150K miles. If I had a better understanding of transmissions when observing the gray paste material surrounding the pan magnet at the last transmission filter change, I could minimize cost with just a torque converter change. As for this repair, (most expensive during ownership) it cost me .0229 per mile. This and the top end rebuild posted earlier, gives a total cost of $5944.85, (.03 cents per mile) returning my truck to service, hopefully getting another 150k miles. Test drove my truck and report shifts are crisper with the only change being when going over overpasses, and sensing the torque change, rpm will drop 25-50 rpms and return on completing the elevation change. Next week I'll go up the Grapevine with a 4k pound truck camper and report how she does.
-
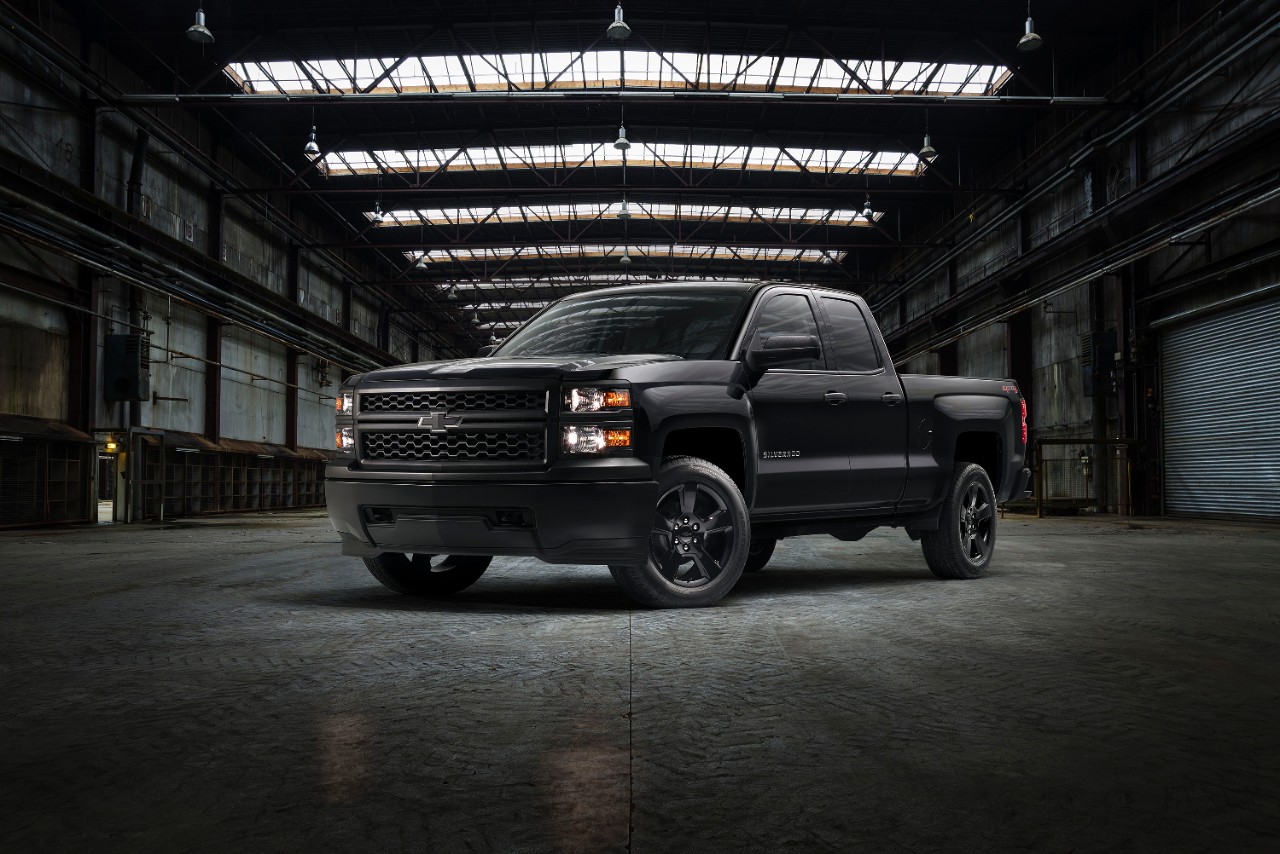
The $1,595 Black Out package adds 20-inch painted aluminum wheels, P275/55R20 all-season blackwall tires, deep tinted glass and black bowties. Chevy prices a 2WD regular cab Silverado WT featuring the Black Out package at $28,895. Of course, the only color option for this package is, you guessed it, black. "The package is available for order now, and customers can have any color they want, as long as it is black."
- 29 comments


